🔏 Safe and Secure Checkout | 🔄 Easy Returns within 30 days | 📜 Free 1 Year Warranty on all Refurbished Gaming Consoles | 👮🏿 💒 Service Member, Government Worker, EMS & Teacher Discount Up To 20%👩⚕️ 🏥 | 📦🏷️✈️ Free U.S Shipping on Orders over $50 - DAILY WORLDWIDE SHIPPING 📦🏷️✈️
How to Clean Vintage Game Cartridges: What You Need to Know First
Knowing how to clean vintage game cartridges comes down to one rule: remove dirt from the gold contacts without removing the gold itself.
Here is the short version. Most "broken" games are not broken at all. They just have dirty contact pins.
What most guides get wrong is the order of operations. They tell you to scrub hard, soak everything, and open the shell on day one. That is backwards.
One note before we start. This guide covers cartridges only.
Key TakeawayThe gold contacts on a cartridge are a thin plating, not solid gold. Every hard scrub removes a little of it. Clean gently, clean often, and the cartridge outlives you.
Game Cartridge Cleaning Tools: What to Use and What to Avoid
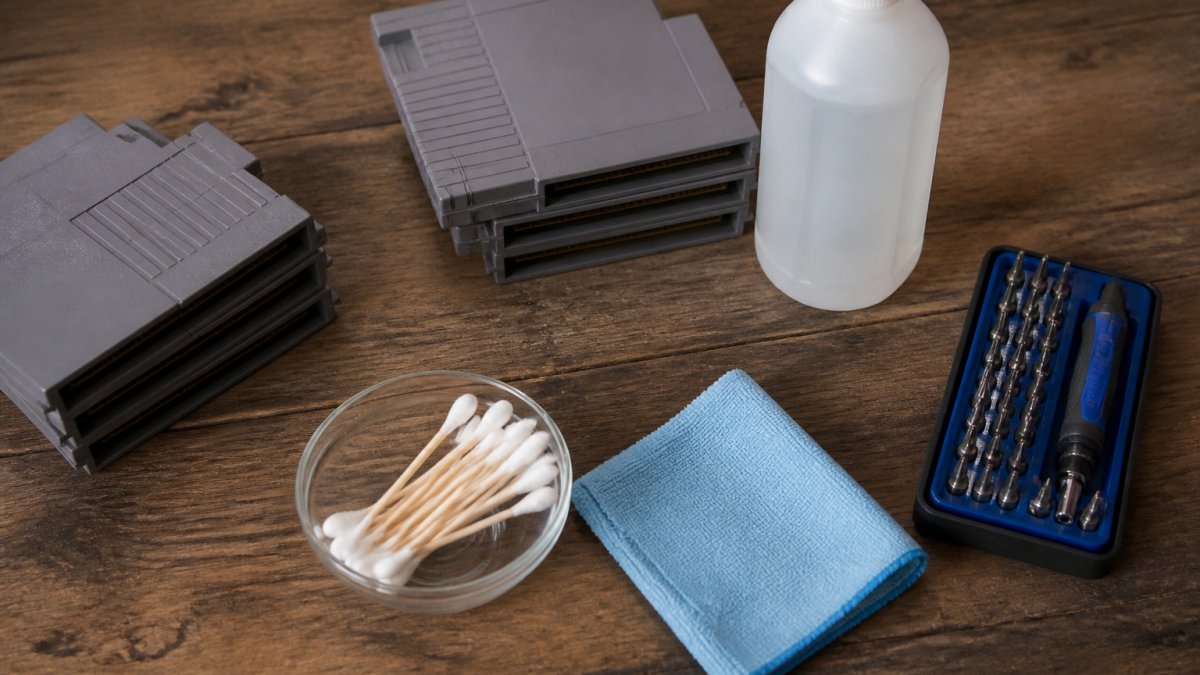
The right cleaning kit for a game cartridge costs very little and fits in a shoebox. You need four things: isopropyl alcohol, cotton swabs, a microfiber cloth, and patience. Everything else is optional.
Close-up overhead shot of a wooden table with retro game cartridges, a bottle of isopropyl alcohol, cotton swabs, a microfiber cloth, and a small screwdriver set arranged neatly
Essential Supplies for Contact Cleaning
These basics handle 95% of cleaning jobs.
Isopropyl alcohol, 90% or higher. This is the workhorse. It dissolves grime and evaporates fast.
Cotton swabs. Standard Q-tips work fine. Buy the paper-stem kind.
Microfiber cloth. For the plastic shell and label area.
A soft toothbrush. For textured plastic and stubborn dust in seams.
A small screwdriver set. Only needed if you plan to open a cartridge later.
Skip the fancy kits. A bottle of alcohol and a bag of swabs will clean a hundred cartridges.
Materials That Can Damage Cartridges
Some common household cleaners will wreck a cartridge on contact. Avoid these completely.
Rubbing alcohol with additives. Many drugstore bottles contain oils or fragrance. Check the label for 90%+ pure isopropyl.
Water. It leaves minerals behind and can rust the pins.
Paper towels. They scratch the gold contacts and shed fibers.
Brass polish and abrasive creams. These strip the gold plating.
Baking soda paste. It is too abrasive for contact pins, despite what forums say.
Glass cleaner and all-purpose sprays. The ammonia and surfactants leave residue.
The rule is simple. If it is not pure isopropyl alcohol or a dry cloth, keep it away from the contacts.
Watch OutNever use a pencil eraser on gold contacts. It feels like it works because the game boots afterward, but the eraser removes a microscopic layer of gold every time. Do it three or four times and the pins are permanently dull.
Step-by-Step: How to Clean Retro Game Cartridges Without Opening Them
You can clean most cartridges without a screwdriver. The contacts sit exposed at the bottom edge of the shell, so you can reach them directly. Work on a clean, well-lit surface, and give yourself 10 minutes per cartridge.
Inspect first. Hold the cartridge up to a light. Look at the gold contacts. Note whether you see dust, dark film, or greenish spots.
Wipe the shell. Dampen a microfiber cloth with a little alcohol. Wipe the plastic, avoiding the label.
Dry-brush the seams. Use the toothbrush dry to lift dust from the grooves and the label edge.
Dampen a swab. Dip one end in isopropyl alcohol. It should be wet, not dripping.
Clean the pins. Rub the swab across the gold contacts in the direction the pins run.
Swap swabs often. Use a fresh swab the moment it turns gray.
Let it dry. Wait two to three minutes before inserting the cartridge.
Test. Insert, power on, and check the result.
Cleaning the Plastic Shell and Label Area
The plastic casing holds decades of dust, fingerprints, and sticker residue. A microfiber cloth lightly dampened with alcohol handles most of it.
Go easy around the label. Alcohol will lift ink if you press hard. For a stubborn sticker, warm the corner with your thumb and peel slowly. Do not use a knife or razor.
For textured shells, the soft toothbrush gets into the ridges better than any cloth.
Cleaning the Exposed Contacts with Isopropyl Alcohol
This step matters most. The gold contacts carry the signal from the game to the console, and any film on them blocks it.
Dampen a cotton swab with isopropyl alcohol. Rub it along the contacts in vertical strokes, following the direction of the pins.
Watch the swab. If it comes back gray or black, that is years of grime coming off.
Let the cartridge sit for two to three minutes. The alcohol flashes off on its own. Insert and test.
Pro TipIf a cartridge boots on the third or fourth try, it usually means the contacts are still dirty, not that the game is dying. Clean it again with a fresh swab before you assume the worst.
Isopropyl Alcohol for Game Cartridges: Concentration, Technique, and Drying Time
Isopropyl alcohol is the only liquid you should put on a cartridge contact, and concentration matters.
Technique is just as important as the product. Here is what works.
Dampen, do not soak. A wet swab is right. A dripping one is not.
One direction. Rub along the pin direction, not across it.
Fresh swab per pass. Reusing a dirty swab just moves grime around.
Two to three minutes of drying. Alcohol evaporates fast at room temperature.
Do not blow on the cartridge to speed drying, your breath adds moisture, the opposite of what you want.
Do not use a hair dryer either. Heat warps the plastic shell and can lift the label.
How to Remove Corrosion from Game Cartridge Contacts
Corrosion looks different from ordinary dirt. Dirt is a dull gray film; corrosion shows up as green, white, or black spots on the gold contacts, sometimes chalky.
For light tarnish, isopropyl alcohol and a cotton swab still work. You will need more passes and more swabs, but the pins will come clean.
For heavier corrosion, you have a few options.
Vinegar, used sparingly. A cotton swab dipped in white vinegar can lift light green corrosion. Wipe it off with a clean alcohol swab immediately after. Do not let vinegar sit on the pins.
A soft pencil eraser, only as a last resort. This removes a little gold. Use it only when nothing else works and the cartridge is otherwise unusable.
A fiberglass scratch pen. A tool for serious repairs. It removes corrosion and a thin layer of gold. Not for beginners.
If the pins are pitted, flaking, or missing gold plating entirely, cleaning will not save them. That cartridge needs a donor board or a professional repair.
Light Tarnish vs. Severe Oxidation: A Decision Guide
Use this table to pick the right method before you touch the cartridge.
What You See
What It Is
Method
Risk
Dull gray film
Dust and skin oils
Isopropyl alcohol + swab
None
Thin brown haze
Light tarnish
Alcohol, extra passes
None
Green or white spots
Active corrosion
Alcohol, then vinegar spot treatment
Low
Black pitting, flaking gold
Severe oxidation
Eraser or fiberglass pen, or replace
High
Missing gold plating
Board damage
Professional repair only
N/A
Start at the top and work down. Only move to a harsher method when the gentler one fails.
Watch OutIf you see green corrosion on the pins, check the rest of your collection. Corrosion spreads in humid storage. One bad cartridge in a box can seed the others.
When to Open a Cartridge: Disassembly, Board Cleaning, and Reassembly Safety
Opening a cartridge is a last resort, not a first step. Do it only when the exposed contacts are clean and the game still will not load, or when corrosion is creeping up the board inside.
Here is the safe process.
Work on a tray. Small screws and springs disappear fast on carpet.
Remove the screws. Most NES and SNES cartridges use standard or security bits. Use the right size, or you will strip the heads.
Split the shell gently. Do not pry with a metal tool. Use a plastic spudger or your fingers.
Lift the board out. Hold it by the edges. Never touch the chip pins or the gold fingers with bare skin.
Clean the board. Use a soft toothbrush lightly dampened with isopropyl alcohol. Brush away dust. Do not scrub the chips.
Inspect for damage. Look for cracked solder joints, bulging capacitors, or corrosion trails.
Let it dry fully. Give the board 10 to 15 minutes before reassembly.
Reassemble in reverse. Seat the board, close the shell, and tighten the screws snug, not tight.
Handle the board with care. Static electricity from a dry room can kill a chip that has survived since 1988.
If you are not comfortable with a screwdriver, do not open the cartridge.
Best ForCollectors with a single stubborn cartridge and a steady hand. If you are cleaning a whole shelf, stick to the no-open method and send the problem cases to a repair shop.
Testing, Storage, and When to Stop: Preventive Maintenance for Your Collection
A cleaned cartridge needs a test run and a good home.
If it still will not load after a proper cleaning, the problem may not be the cartridge.
Clean the console's connector. The 72-pin slot on an NES collects the same grime that builds on cartridges.
Test a known-good game. If another cartridge works in the same slot, the problem is the first cartridge.
Try a different console. This isolates whether the fault is the game or the hardware.
Once a cartridge works, store it well. Keep games in plastic cases, upright, away from direct sun and damp basements.
If a cartridge has been cleaned three times and still will not boot, stop.
Bringing Your Vintage Games Back to Life
Cartridge care is not complicated. It is just easy to get wrong. Use 90% isopropyl alcohol, cotton swabs, and a light touch. Clean the pins in the direction they run.
That routine will keep a working collection working for decades.
If you would rather skip the trial and error, we do the work for you.
Can you use 70% isopropyl alcohol to clean game cartridges?
Yes, 70% isopropyl alcohol works for cleaning game cartridge contacts. It contains more water than 90% or higher concentrations, so it evaporates a bit slower, but it still removes dust, dirt, and light residue effectively. For heavy corrosion or stubborn grime, 90% or higher is preferred because it dries faster and leaves less moisture behind. Always apply alcohol to a cotton swab or cloth, never directly into the cartridge, and let the cartridge dry completely before inserting it into a console.
How do you clean a vintage game cartridge without opening it?
You can clean most vintage game cartridges without opening them by focusing on the exposed contact pins and the plastic shell. Dip a cotton swab in isopropyl alcohol and gently rub it along the gold contacts in the direction of the pins. Use a microfiber cloth or a soft toothbrush to remove dust from the shell and label area. For deeper grime around the connector slot, a thin card wrapped in a lightly dampened cloth can reach inside without disassembly. Let everything dry fully before testing.
How do you remove corrosion from game cartridge contacts?
For light corrosion or tarnish, start with isopropyl alcohol and a cotton swab. For severe oxidation, a very fine abrasive like a pencil eraser can help, but use caution. If the corrosion has eaten into the metal or damaged the board, cleaning may not be enough and the cartridge could need professional repair.
How long should a game cartridge dry after cleaning?
After cleaning with isopropyl alcohol, let the cartridge air-dry for at least 10 to 15 minutes. Drying time depends on humidity and how much liquid was applied. Never insert a damp cartridge into a console, as moisture can damage the console's pin connector. A quick visual check and a feel for dryness is usually enough before testing.




Einen Kommentar hinterlassen